

In January 2026 alone, hackers and scammers stole $370 million from crypto users (the highest monthly total in nearly a year). A single phishing attack drained $284 million from one victim. Address poisoning scams now occur over one million times daily on Ethereum. The attackers are sophisticated, patient, and ruthless.
But here’s the good news: nearly every major crypto loss is preventable. The difference between a victim and a secure user isn’t luck, it’s setup. With the right wallet, the right security habits, and a few minutes of careful configuration, you can reduce your risk from “if” to “almost certainly not.”
I’ve helped dozens of friends set up their first wallets. I’ve seen the same mistakes repeated: screenshots of seed phrases, hardware wallets bought from Amazon, approvals never revoked. Each time, the fix was simple, but the damage was permanent.
This guide walks you through exactly how to set up a secure crypto wallet, whether you’re using a hot wallet for daily DeFi or a hardware wallet for long‑term savings. Follow these steps, and you’ll join the minority of crypto users who truly understand self‑custody.
Before You Start: Understanding Your Wallet Options
The Two Fundamental Decisions
Before you set up anything, you need to decide:
- Do you want convenience or maximum security?
- Do you want to control your keys or let someone else handle the responsibility?
Wallet Types at a Glance
| Wallet Type | Who Holds Keys? | Best For | Security Level |
|---|---|---|---|
| Exchange Wallet (Custodial) | The exchange | Beginners, active trading | Low (counterparty risk) |
| Hot Wallet (MetaMask, Trust Wallet) | You | Daily DeFi, small amounts, NFTs | Medium |
| Hardware Wallet (Ledger, Trezor) | You (offline) | Long‑term savings, large holdings | High |
| Paper Wallet (Legacy) | You | Long‑term storage (not recommended) | High but impractical |
The “Not Your Keys, Not Your Coins” Principle
If you don’t control the private keys, you don’t truly own the cryptocurrency, you hold an IOU from whoever does. Exchange wallets are convenient, but they introduce counterparty risk: the exchange can be hacked, freeze your funds, or go bankrupt (FTX). Self‑custody places the responsibility on you, but it also gives you true ownership.
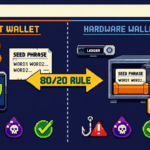
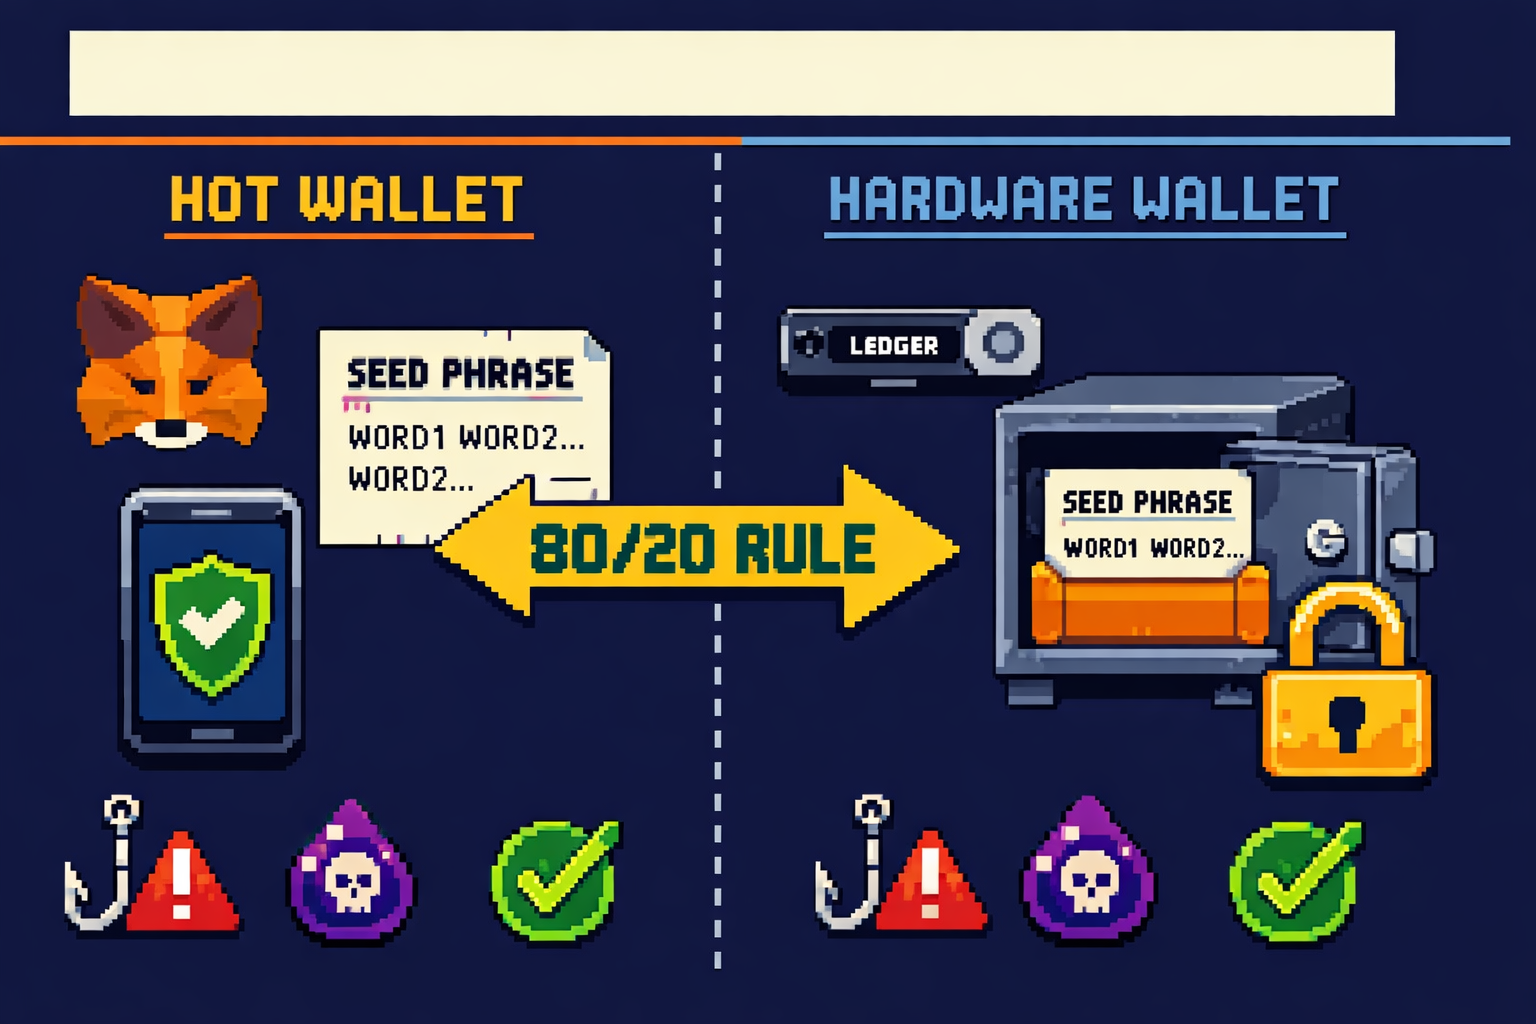
The 80/20 Rule (Preview)
Security experts recommend storing 80‑90% of your crypto in cold storage (hardware wallets) and keeping only 10‑20% in hot wallets for active use. This compartmentalization strategy limits your exposure if a hot wallet is ever compromised.
Step 1: Choose the Right Wallet for Your Needs
Decision Matrix
| If you are… | Recommended Wallet | Why |
|---|---|---|
| Complete beginner with under $500 | Exchange wallet (Coinbase, Kraken, Bitget) | No key management responsibility |
| Using DeFi or NFTs regularly | MetaMask or Trust Wallet (hot) | Browser extension convenience |
| Holding $1,000‑$10,000 for long term | Hardware wallet (Ledger Nano S Plus or Trezor Safe 3) | Offline security |
| Holding $10,000+ | Hardware wallet + metal seed backup | Maximum protection |
| Using multiple blockchains | MetaMask + Ledger combo | Hot for daily, cold for savings |
Wallet Comparison Table (March 2026)
| Wallet | Type | Key Features | Approx Price |
|---|---|---|---|
| MetaMask | Hot (browser/mobile) | 30M+ MAU, EVM chains, dApp integration | Free |
| Trust Wallet | Hot (mobile) | Multi‑chain, built‑in staking, dApp browser | Free |
| Ledger Nano X | Cold (hardware) | Bluetooth, mobile app, 5,500+ assets | $149 |
| Ledger Nano S Plus | Cold (hardware) | USB‑only, same security as X | $79 |
| Trezor Safe 3 | Cold (hardware) | Open source, secure element, Shamir backup | $79 |
| Trezor Safe 5 | Cold (hardware) | Touchscreen, Shamir backup, haptic feedback | $169 |
Where to Buy Hardware Wallets
CRITICAL: Only buy hardware wallets directly from the manufacturer’s official website (Ledger.com, Trezor.io). Never buy from Amazon, eBay, or third‑party resellers. They could be tampered with or pre‑initialized with a seed phrase known to the attacker.
Step 2: Set Up a Hot Wallet (MetaMask Guide)

Why MetaMask? MetaMask is the most popular non‑custodial wallet, with over 30 million monthly active users. It works as a browser extension and mobile app, supporting Ethereum and all EVM‑compatible blockchains (Polygon, Arbitrum, Base, BNB Chain).
Step‑by‑Step Setup
Step 2.1: Download from Official Source Only
Go to metamask.io. Click “Download” and ensure you’re redirected to the Chrome Web Store or official app store. Verify the URL shows chrome.google.com/webstore or the official app store.
CRITICAL: There are dozens of fake MetaMask extensions in the Chrome Web Store. Always verify the extension name and publisher. It should be “MetaMask” with over 10 million users.
Step 2.2: Install and Create Wallet
Click “Add to Chrome,” then “Add extension.” The MetaMask fox icon will appear in your browser toolbar. Open MetaMask, agree to terms, and click “Create a new wallet.”
Step 2.3: Create a Strong Local Password
Create a password of at least 15 characters containing letters, numbers, and symbols. This password encrypts your wallet data locally. If you forget it, you can only recover with your seed phrase.
Step 2.4: Receive and Protect Your Secret Recovery Phrase
MetaMask will generate a 12‑word Secret Recovery Phrase (seed phrase). This is the master key to your wallet. Anyone with these words can control your funds.
The system will ask you to re‑enter the phrase to confirm it’s recorded correctly. Do not skip this step.
Step 2.5: Store Your Seed Phrase Offline
Write the 12 words in exact order on paper. Never store digitally – no screenshots, cloud storage, email drafts, or password managers.
Step 2.6: Add Networks (Optional)
By default, MetaMask connects to Ethereum Mainnet. You can add Polygon, Arbitrum, Base, and other networks manually or via chainlist.org.
Step 2.7: Fund Your Wallet
From an exchange, copy your MetaMask public address (starts with 0x) and send a small test amount first ($5‑10). Confirm arrival before sending larger sums.
⚠️ SECURITY WARNING: NEVER ENTER YOUR SEED PHRASE INTO ANY WEBSITE, FORM, OR APP. MetaMask will never ask for your recovery phrase outside of the initial setup. If a site asks for it, it’s a scam.
Step 3: Set Up a Hardware Wallet (Ledger Guide)
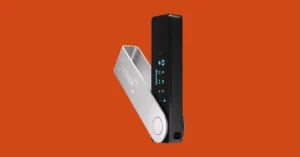
Why a hardware wallet? Hardware wallets store your private keys offline on a secure element chip – the same technology used in credit cards and passports. Even if your computer is infected with malware, an attacker cannot sign a transaction without physically pressing buttons on your device.
Step‑by‑Step Setup (Ledger Nano X Example)
Step 3.1: Unbox and Inspect
Check the packaging for signs of tampering. The device should not be pre‑initialized. If it prompts you to “Restore from recovery phrase” on first boot, it may be compromised. Contact Ledger support.
Step 3.2: Download Ledger Live from Official Site
Go to ledger.com and download Ledger Live – the companion app for managing your device. Available for Windows, macOS, Linux, Android, and iOS.
Step 3.3: Connect and Initialize
Connect your Ledger to your computer via USB‑C (or Bluetooth for Nano X). Press both buttons simultaneously to power on. When prompted, choose “Setup as new device.”
Step 3.4: Choose a Strong PIN
Your device will ask you to choose a PIN code (4‑8 digits). This PIN protects the device if it’s lost or stolen. After several failed attempts, the device will reset automatically. Never use common PINs like 1234 or 0000.
Step 3.5: Write Down Your 24‑Word Recovery Phrase
Your Ledger will generate a 24‑word recovery phrase, displayed one word at a time on the device screen. Write each word in order on the included recovery sheet. This is the only backup for your funds. If you lose your device, this phrase restores everything.
Step 3.6: Confirm Your Recovery Phrase
The device will ask you to confirm random words from your phrase. This ensures you wrote them down correctly. Do not skip this step.
Step 3.7: Install Blockchain Apps
In Ledger Live, go to the “Manager” tab and install apps for the cryptocurrencies you plan to store (Bitcoin, Ethereum, Solana, etc.). Each app allows your device to manage that blockchain’s assets.
Step 3.8: Add Accounts and Receive Crypto
After installing apps, add corresponding accounts. Ledger Live will generate receiving addresses. Always verify the address displayed on your computer matches the address shown on your Ledger device screen before copying.
Step 3.9: Test with a Small Amount
Before moving large sums, send a small test transaction ($5‑10) from an exchange to your hardware wallet address. Confirm it arrives. Then send a small amount back to the exchange to confirm you can withdraw.
⚠️ SECURITY WARNING: NEVER share your 24‑word recovery phrase with anyone. Never enter it into any website, app, or computer. Legitimate customer support will never ask for it. Anyone who does is a scammer.
Step 4: The 80/20 Rule. How to Split Your Crypto
The Compartmentalization Strategy
Security experts recommend storing 80‑90% of your crypto holdings in cold storage (hardware wallet) and keeping only 10‑20% in hot wallets for active trading or DeFi participation. This compartmentalization strategy limits your exposure if a hot wallet is ever compromised.
Why This Works
| Scenario | Without Compartmentalization | With 80/20 Rule |
|---|---|---|
| Hot wallet drained | 100% loss | 20% loss (savings untouched) |
| Exchange hacked | 100% loss | 20% loss (if any on exchange) |
| Smart contract exploit | 100% loss of DeFi funds | Only at‑risk portion affected |
How to Implement
- Hardware wallet: Your savings layer – Bitcoin, Ethereum, and long‑term holdings.
- Hot wallet: Your spending layer – funds for DeFi, NFTs, or trading.
- Exchange wallet: Your fiat on‑ramp – only for active trading, not storage.
Example Allocation for a $10,000 Portfolio
- Hardware wallet: $8,000 (Bitcoin, Ethereum long‑term)
- Hot wallet: $1,500 (DeFi, NFTs, daily use)
- Exchange wallet: $500 (active trading, fiat on‑ramp)
Pro Tip: Use multiple hardware wallets for extreme compartmentalization. One for Bitcoin‑only savings, one for Ethereum DeFi, one as a backup. Never keep all your eggs in one basket.
Step 5: Master Seed Phrase Security (Most Critical)
The One Rule That Overrides Everything
Your seed phrase (recovery phrase) is your money. If someone gets it, they get your crypto. If you lose it, your crypto is gone forever. No customer support, no password reset, no recovery.
The Four Commandments of Seed Phrase Security
1. NEVER Store Digitally
Never take a screenshot of your seed phrase. Never store it in Google Drive, iCloud, Notion, email drafts, or a password manager. Malware can scan for these files, and cloud accounts can be hacked.
2. Write It Down on Paper (or Better Yet, Metal)
Write your seed phrase on the included card using a pen. Store it in a fireproof safe. For larger holdings ($10,000+), upgrade to a steel backup plate. These survive fires, floods, and physical damage.
3. Create Multiple Copies in Separate Locations
Store copies in geographically separate locations: one in your home safe, one with a trusted family member, one in a bank safety deposit box. If one location burns down, you have backups.
4. Never Share It with Anyone
No legitimate service, not MetaMask, not Ledger, not Coinbase, not a “support agent”, will ever ask for your seed phrase. Anyone who does is a scammer.
The 3‑2‑1 Backup Rule
| Rule | Meaning |
|---|---|
| 3 copies of your seed phrase | Original + two backups |
| 2 different storage methods | Paper + metal, or home + bank |
| 1 off‑site backup | In case your home is compromised |
What NOT to Do (Real Losses)
| Mistake | Consequence |
|---|---|
| Saving seed phrase in Google Docs | Hacked account → funds stolen |
| Screenshot on phone | Phone stolen → funds stolen |
| Telling a “friend” | Trust betrayed → funds stolen |
| Storing only one copy | Fire or flood → funds gone forever |
Pro Tip: For extreme security, consider Shamir Backup (available on Trezor). Split your seed phrase into multiple shares. You need a threshold number of shares to recover, protecting against single‑point failure.
Step 6: Enable 2FA and Exchange Security
Why Exchange Security Matters
Even if you move most of your crypto to self‑custody, you’ll still use exchanges to buy crypto and cash out. Compromised exchange accounts can lead to drained funds before you ever move them to your wallet.
The 2FA Hierarchy
| Method | Security Level | Risk |
|---|---|---|
| SMS verification | Low | SIM swap attacks |
| Authenticator app (Google Authenticator, Authy) | High | Codes generated locally, no network interception |
| Hardware security key (YubiKey) | Highest | Requires physical touch |
Never use SMS 2FA. Attackers can trick your phone carrier into transferring your number to their SIM card, intercepting your codes.
Exchange Security Checklist
- Enable 2FA with authenticator app (not SMS)
- Enable withdrawal whitelisting (addresses must be pre‑approved)
- Set an anti‑phishing code for emails
- Use a unique, strong password (not reused from other sites)
- Review connected devices regularly
- Consider using a dedicated email address for crypto
Exchange Protection Funds
| Exchange | Protection Fund |
|---|---|
| Binance | SAFU Fund ($1B+) |
| Bitget | Protection Fund ($300M+) |
| Kraken | Proof of Reserves, no major hacks |
| Coinbase | FDIC insurance on USD balances |
Step 7: Revoke Unused Approvals and Maintain Hygiene
The Forgotten Risk: Token Approvals
Every time you connect to a DeFi protocol (Uniswap, OpenSea, Aave), you approve that smart contract to spend your tokens. These approvals remain active forever unless revoked. A compromised or malicious protocol could drain your wallet using a dormant approval.
How to Revoke Approvals
- Go to Revoke.cash
- Connect your wallet
- Review all active approvals
- Revoke any you don’t recognize or no longer use
Gas Fees Note: Revoking approvals costs a small gas fee. It’s worth it for the peace of mind – an old approval from a shady site is an open door to your funds.
Monthly Wallet Hygiene Checklist
- Revoke unused token approvals (Revoke.cash)
- Check for unexpected transactions
- Verify wallet addresses (no address poisoning)
- Update wallet software and firmware
- Review connected dApps and disconnect unused ones
Address Poisoning Protection
Attackers send $0 transactions from addresses that look almost identical to yours. When you copy from transaction history, you might accidentally send funds to the scammer. Always verify the full address, not just the first and last few characters.
Pro Tip: Use the address book/whitelist feature on your exchange. Save trusted addresses so you never have to copy‑paste.
Common Setup Mistakes That Cost Users Millions
Mistake 1: Digital Seed Phrase Storage
Taking a screenshot of your seed phrase is the #1 way people lose funds. Your phone’s cloud backup syncs that screenshot to the internet, where hackers can find it.
Fix: Paper only. Metal for large amounts.
Mistake 2: Buying Hardware Wallets from Amazon
Third‑party resellers can tamper with devices or pre‑initialize them with a seed phrase known to the attacker.
Fix: Buy directly from the manufacturer (Ledger.com, Trezor.io).
Mistake 3: Not Testing Recovery
Setting up a wallet, depositing funds, and never testing the seed phrase. Years later, when the device fails, you discover your written phrase has a typo or missing word. Funds gone forever.
How to test recovery
- Send a small amount to your wallet
- Wipe the device (reset to factory)
- Restore using your seed phrase
- Verify funds are accessible
- Now you know your backup works
Mistake 4: Using the Same Seed Phrase Across Wallets
If one wallet is compromised, all are compromised.
Fix: Use different seed phrases for different purposes (savings vs spending).
Mistake 5: Blindly Approving Transactions
Always verify transaction details on your device screen, especially the receiving address and amount. Malware can change what’s displayed on your computer.
Mistake 6: Connecting Wallet to Unknown Sites
Every time you connect your wallet to a website, you grant it permissions. Some are malicious drainers disguised as “free NFT minting” or “airdrop claim” sites.
Mistake 7: Ignoring Firmware Updates
Firmware updates often contain critical security patches. Ignoring them leaves your device vulnerable to known exploits.
Security Checklist: Print and Follow
Initial Setup (First‑Time)
- Wallet downloaded from official source (no ads, no third‑party stores)
- Seed phrase written on paper (no screenshots, no cloud)
- Seed phrase stored in secure location (safe, lockbox)
- Multiple backup copies in separate locations
- Recovery phrase tested (wiped and restored with small amount)
- Strong PIN/password set (15+ characters, not reused)
- 2FA enabled with authenticator app (not SMS)
- Withdrawal whitelist enabled
- Device firmware updated
Ongoing (Monthly)
- Revoke unused token approvals (Revoke.cash)
- Check wallet for unexpected transactions
- Update wallet software and hardware firmware
- Review connected dApps, disconnect unused
- Verify withdrawal whitelist addresses
Before Each Transaction
- Verify full receiving address (all characters, not just first/last)
- Check amount before confirming
- On hardware wallet: confirm address matches device screen
- Test with small amount before large transfers
Next Steps: From Setup to Long‑Term Security
You’ve set up your wallet. Here’s what to do now:
First 24 Hours
| Task | Priority |
|---|---|
| Test seed phrase recovery with small amount | HIGH |
| Enable 2FA on exchange accounts | HIGH |
| Set withdrawal whitelist | HIGH |
| Move long‑term holdings to hardware wallet | MEDIUM |
First Week
- Research phishing tactics and common scams
- Join security‑focused Discord/Twitter communities
- Subscribe to scam alert channels
Ongoing (Monthly)
- Revoke unused approvals (Revoke.cash)
- Check for address poisoning attempts
- Update wallet firmware
Essential Next Reads
- 📚 How to Avoid Crypto Scams: Complete 2026 Guide
- 📚 Best Hardware Wallets 2026
- 📚 What is a Crypto Wallet? Hot vs Cold Storage Explained
Join the Community
Security is a community effort. Share this guide with friends new to crypto. Join our Discord for scam alerts and security discussions. Follow us on Twitter for real‑time warnings about new threats.
Final Thought
Your crypto is valuable. Treat it like the life‑changing asset it could become. The extra 20 minutes you spend setting up your wallet correctly today could save you years of regret tomorrow.
Be paranoid. Stay safe. And never, ever share your seed phrase.
Disclaimer: This guide is for educational purposes only and does not constitute financial or legal advice. Self‑custody carries responsibility. Always verify information from official sources and never invest more than you can afford to lose.
This guide was last updated for the 2026 edition. Scam tactics and security best practices evolve daily. Always verify current information through official channels.
Frequently Asked Questions
How do I set up a crypto wallet for the first time?
Choose your wallet type (exchange, hot, or hardware), download from the official source, create a strong password, write down your seed phrase offline, and fund your wallet with a small test amount first. Never share your seed phrase with anyone.
How do I set up MetaMask safely?
Download only from metamask.io, not from ads or search results. Create a strong password, write down your 12‑word recovery phrase on paper (no screenshots), and never enter your seed phrase into any website or app. MetaMask will never ask for it.
How do I set up a Ledger hardware wallet?
Download Ledger Live from ledger.com, connect your device, choose “Setup as new device,” create a PIN, write down your 24‑word recovery phrase, and install blockchain apps. Always verify addresses on the device screen before confirming transactions.
How should I store my crypto wallet seed phrase?
Write it on paper using a pen. Store it in a fireproof safe. For larger holdings ($10,000+), upgrade to a steel backup plate that survives fire and water. Never store it digitally - no screenshots, no cloud storage, no password managers.
What is the 80/20 rule for crypto storage?
Keep 80‑90% of your crypto in cold storage (hardware wallet) for long‑term savings and only 10‑20% in hot wallets for daily DeFi, trading, or NFT use. This compartmentalization limits your losses if a hot wallet is compromised.
How do I avoid address poisoning scams?
Always verify the full receiving address, every character, not just the first and last few digits. Use the address book/whitelist feature on your exchange. Attackers send $0 transactions from addresses that look almost identical to yours, hoping you’ll copy from transaction history.
How often should I revoke token approvals?
Review and revoke unused approvals monthly using Revoke.cash. Every DeFi interaction leaves an approval; old approvals from shady sites are open doors to your funds.
Is it safe to keep crypto on an exchange?
For small amounts or active trading, exchanges are convenient. But exchanges can be hacked, freeze funds, or go bankrupt (FTX). For long‑term savings, move your crypto to a self‑custody wallet where you control the private keys.
What’s the difference between custodial and non‑custodial wallets?
Custodial wallets (exchange wallets) hold your private keys for you (convenient but introduces counterparty risk). Non‑custodial wallets (MetaMask, Ledger) give you full control of your keys, following “not your keys, not your coins.”
How do I test my seed phrase backup?
Send a small amount to your wallet, wipe the device (reset to factory), restore using your seed phrase, and verify your funds are accessible. This proves your backup works before you deposit significant amounts.
What is the best 2FA method for crypto exchanges?
Hardware security keys (YubiKey) are best, followed by authenticator apps (Google Authenticator, Authy). Never use SMS 2FA(SIM swap attacks can intercept your codes).
How do I connect MetaMask to a hardware wallet?
In MetaMask, go to account menu, click “Connect Hardware Wallet,” select Ledger or Trezor, and follow the prompts. You’ll manage your hardware wallet funds through MetaMask’s interface while keys remain offline.
Can a hardware wallet be hacked?
Hardware wallets store private keys offline on a secure element chip. Remote hacking is virtually impossible. Physical attacks require specialized equipment and expertise. For practical purposes, properly used hardware wallets are the safest storage method available.
What should I do if I think my wallet is compromised?
Immediately move all funds to a new wallet created on a clean device. Create a new seed phrase. Revoke all approvals. If on an exchange, freeze withdrawals and contact support. Report to FBI IC3 (ic3.gov) and local authorities.